7 greatest Google Pictures ideas and methods it’s essential know
Supply: Ara Wagoner / Android Central
Whether or not or not you are utilizing the greatest Android cameras, there’s actually no purpose you should not be utilizing Google Pictures to again up and edit the pictures you take. Google Pictures is Google’s (previously free) photograph backup, modifying, administration, and printing service. It isn’t simply among the finest photograph backup apps round, it is also one of many greatest photograph modifying apps, and it is greater than worthy to soundly guard the reminiscences of your most treasured moments.
Having used Google Pictures for six years now, I’ve picked up fairly just a few little options and ideas to assist make Pictures a good higher service and even simpler to make use of as I take, edit, and share pictures each personally and professionally. Wish to supercharge your Google Pictures expertise? Listed here are my favourite Google Pictures ideas and methods.
Thoughts what you archive and what you delete
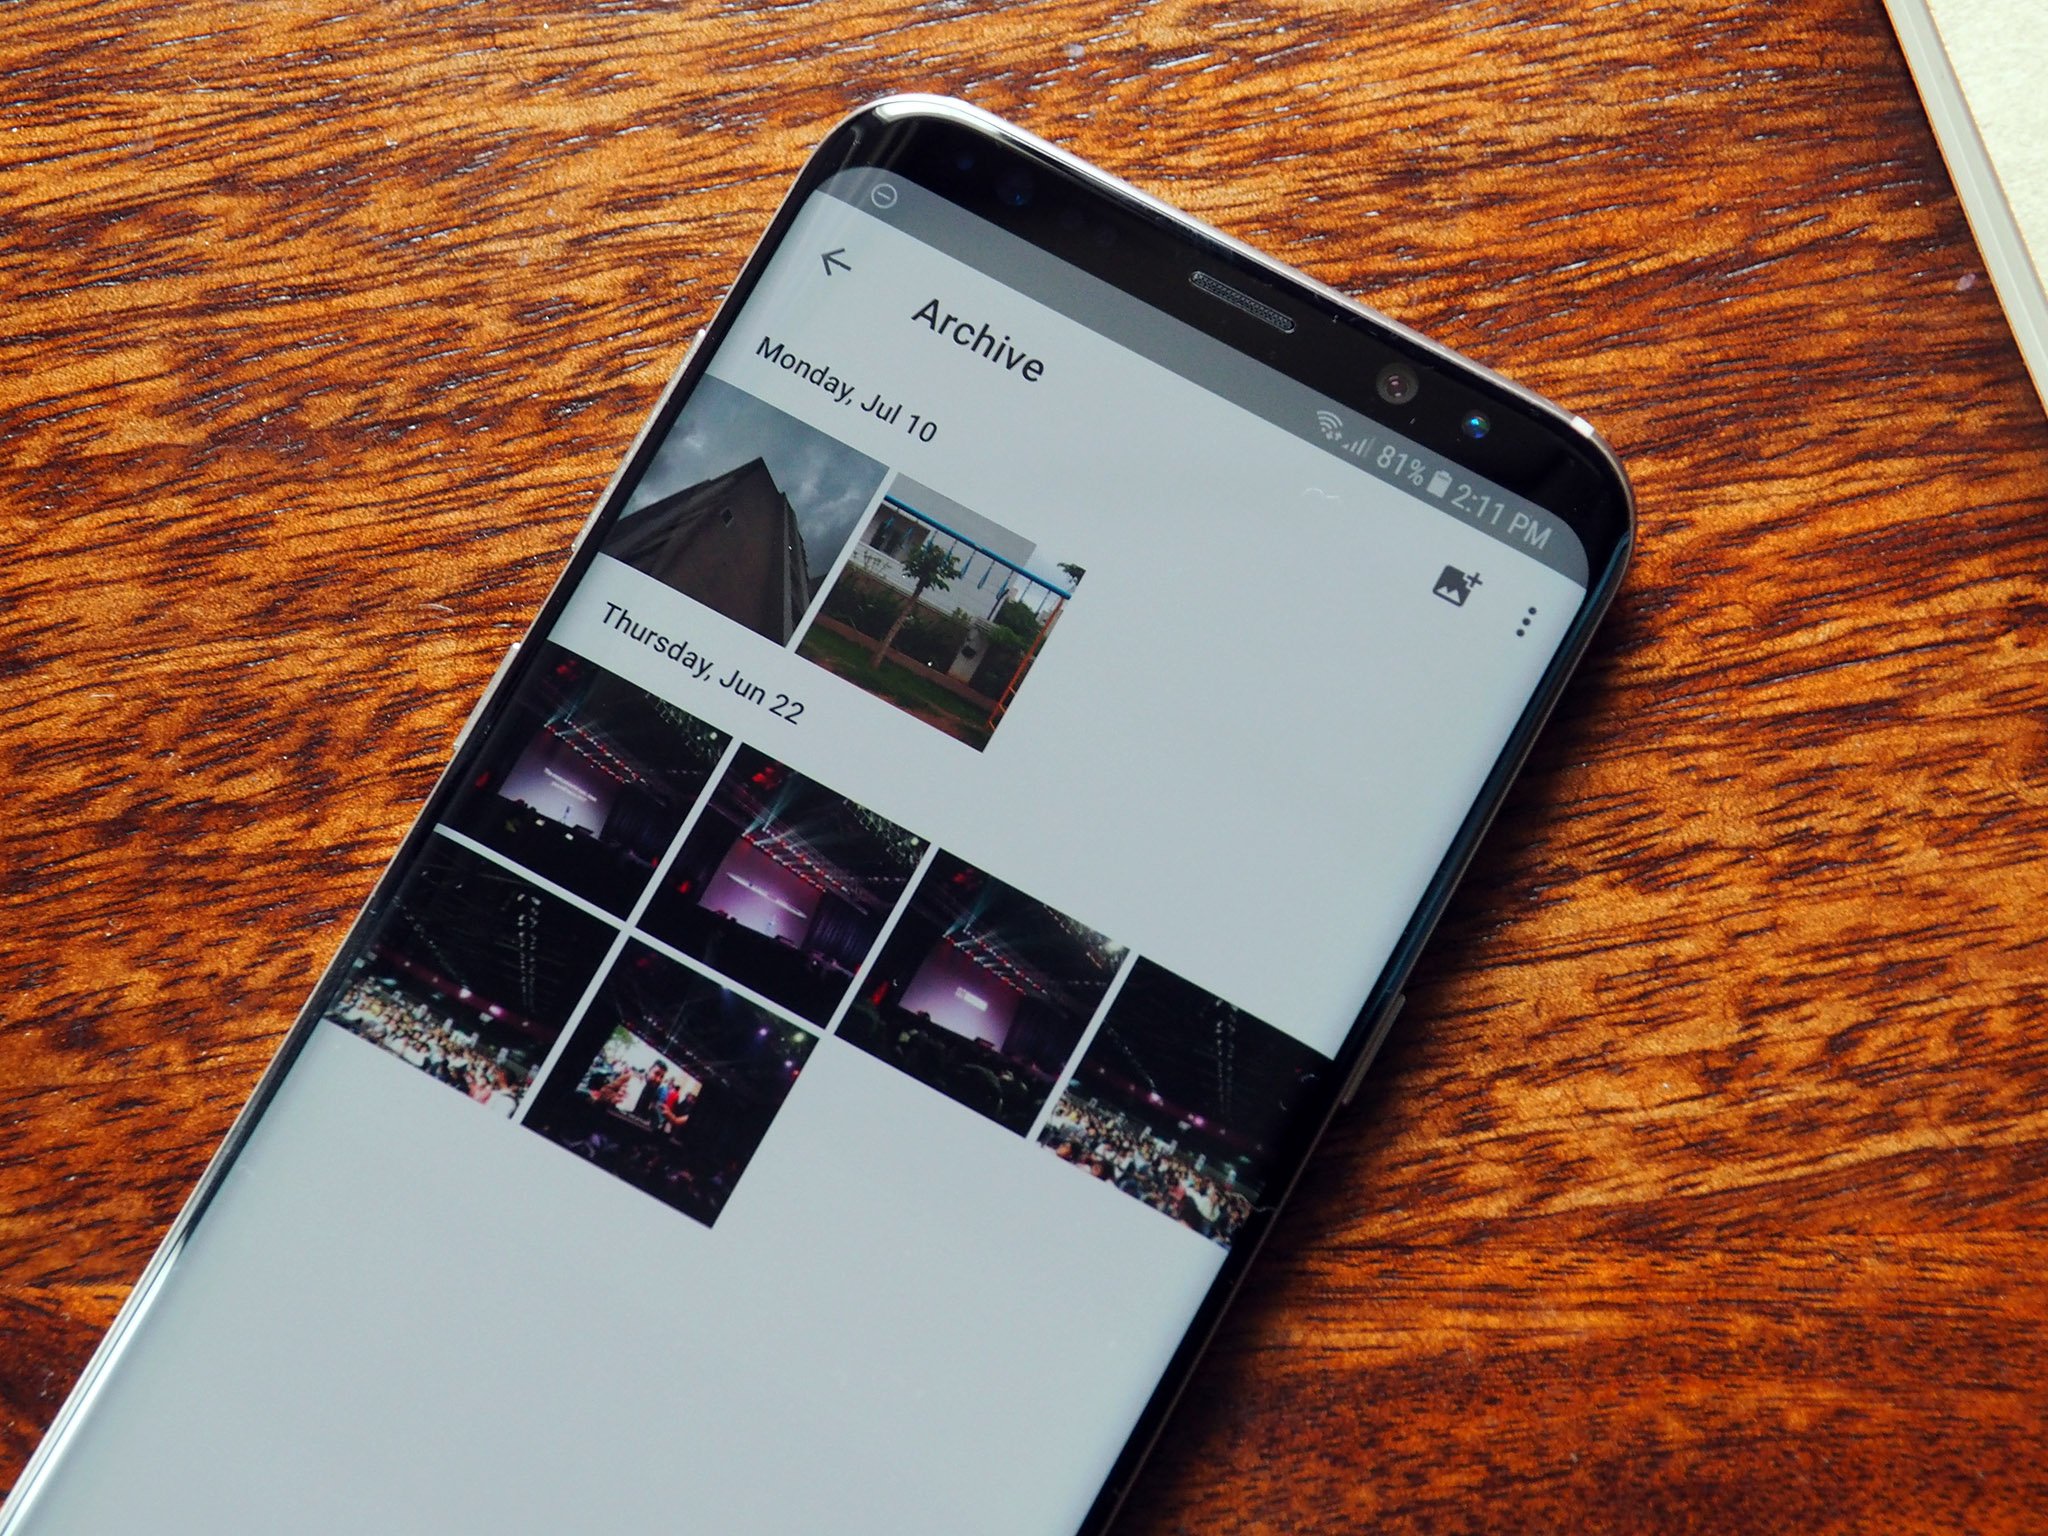
Supply: Android Central
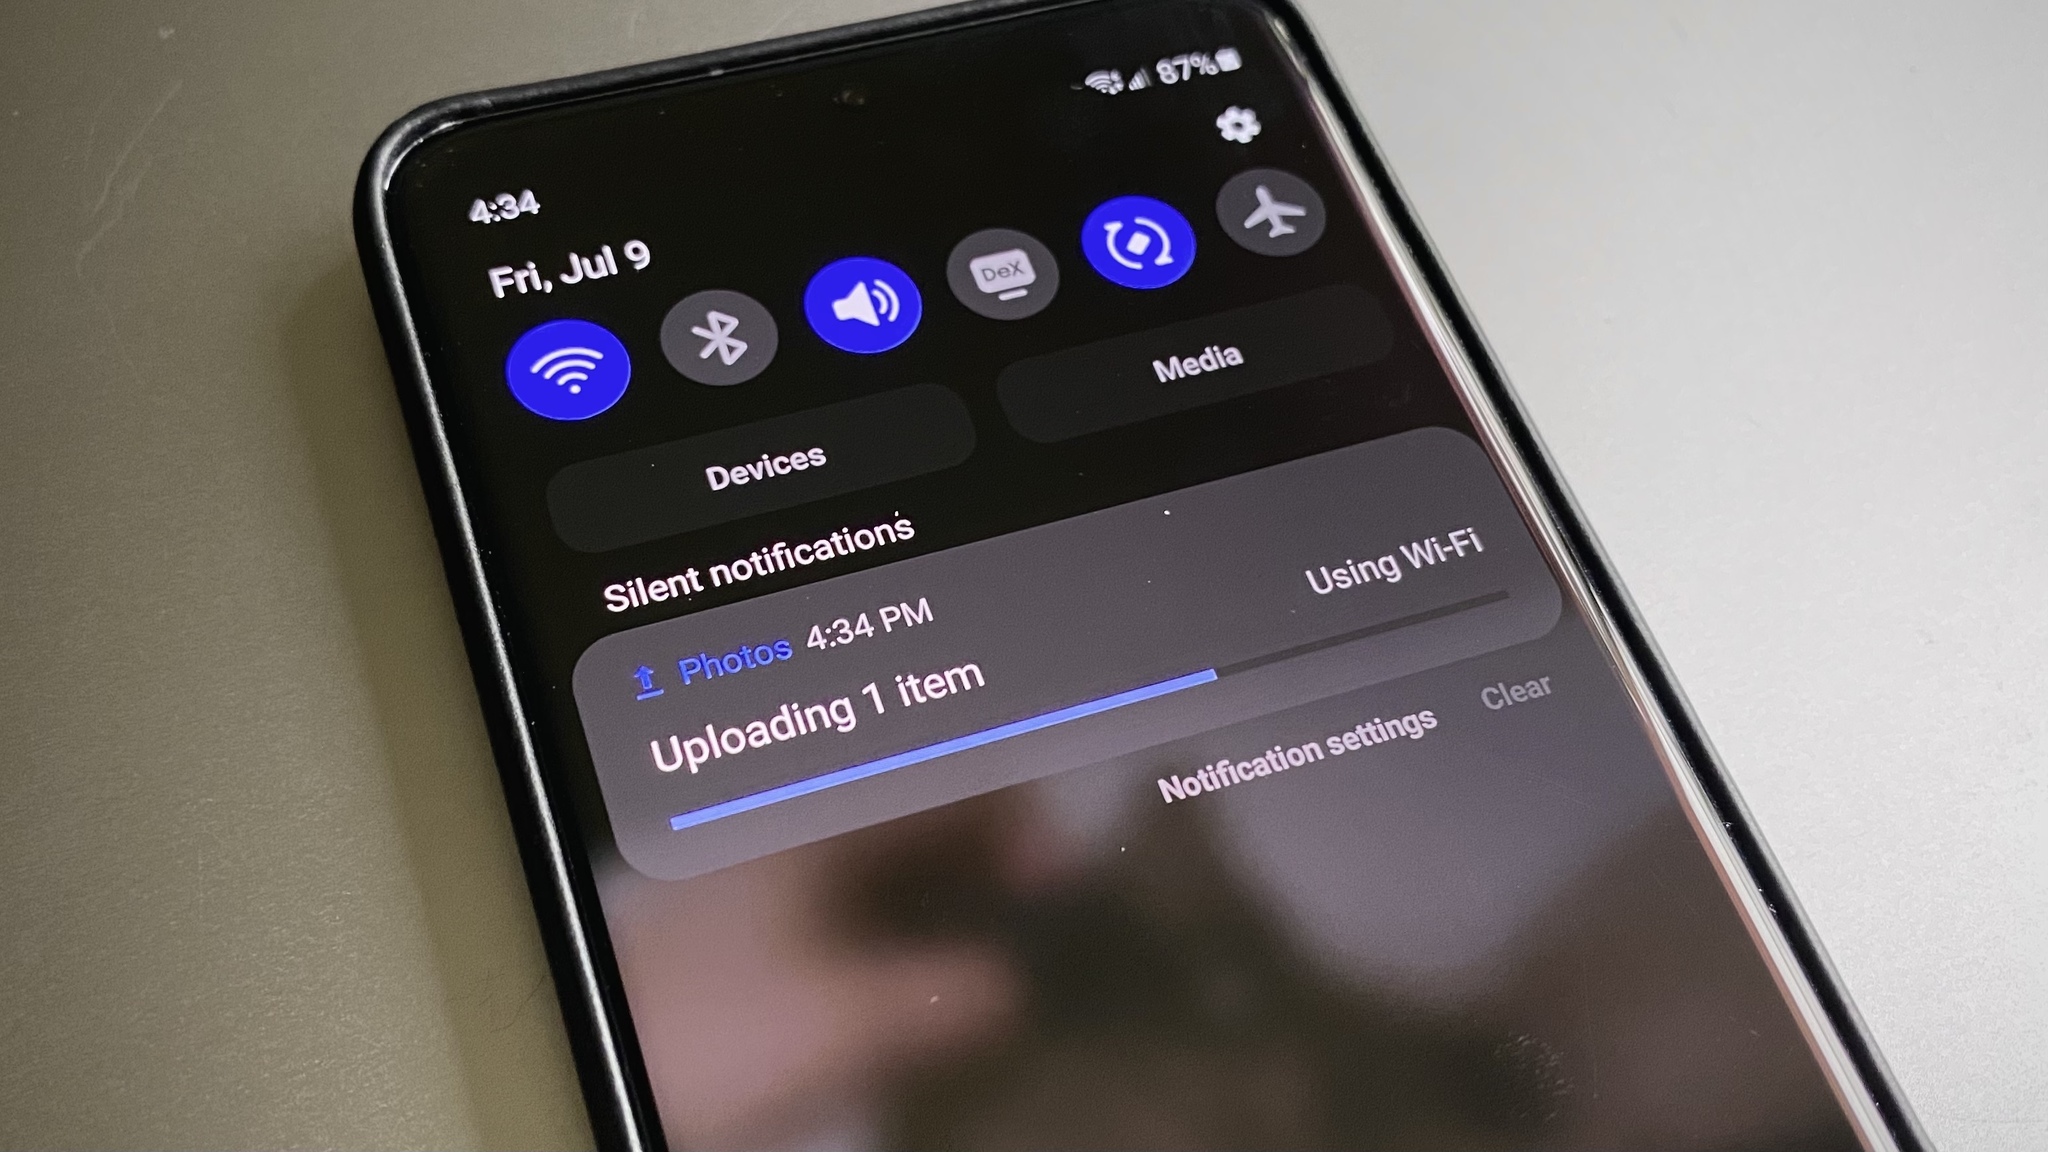
As a result of most of us have Google Pictures backups turned on by default, generally footage get uploaded that we would slightly … weren’t. Whenever you get these pictures into your net library, there are two methods to deal with any notably delicate footage, however watch out for the pitfalls of every.
Archiving a photograph is a simple strategy to get it off the primary feed however recoverable in the event you actually, actually need it. At any time when I’ve to take pictures of issues like insurance coverage playing cards or registration data, I archive them in order that I can nonetheless reference them, however they don’t seem to be sitting in the primary Picture feed in case somebody begins scrolling by way of it whereas I am stepping again from my laptop.
Archived pictures nonetheless depend in direction of your storage restrict — in spite of everything, they’re nonetheless in your library — and they’re nonetheless searchable, so if somebody searches “social safety card,” it would present up. Archiving was once how I handled all pictures I took for articles as soon as I used to be executed, however now that they depend in direction of the storage restrict, I am going to have to coach myself to begin deleting as an alternative.
Deleting a photograph will take away it out of your library and put it within the trash, however the photograph is not really deleted till 60 days later. Because of this in the event you’re deleting a photograph that should vanish instantly, go to the Google Pictures Trash Folder and click on Empty trash to nuke it from existence.
Picture modifying is best on the internet, however video modifying remains to be app-only

Supply: Google
I’ve managed and edited virtually all of my evaluation pictures utilizing Google Pictures for 5 years. Whereas I might get Photoshop by way of work, why trouble with that problem when 95% of the time, what I have to tweak is straightforward as pie contained in the Google Pictures net editor and app editor?
Should you’re on the go, the net editor will get the job executed for pictures — and for movies, it is nonetheless your solely choice. Whereas the function is allegedly, finally, hopefully coming to the net, the truth that it did not even come to iPhone till final month means we’ll possible be ready some time. Video modifying remains to be principally primary options for now, however hopefully, extra are coming. For now, you possibly can:
- Trim video size
- Take away audio
- Stabilize video
- Export video body
- Crop/rotate video
- Alter brightness/coloration
- Apply filters
- Markup video with annotations
Fortunately, I haven’t got to edit movies fairly often, so I can depend on my most popular editor on the Google Pictures web site. You possibly can see extra controls at a single time slightly than having to do each one individually within the Google Pictures Android app.
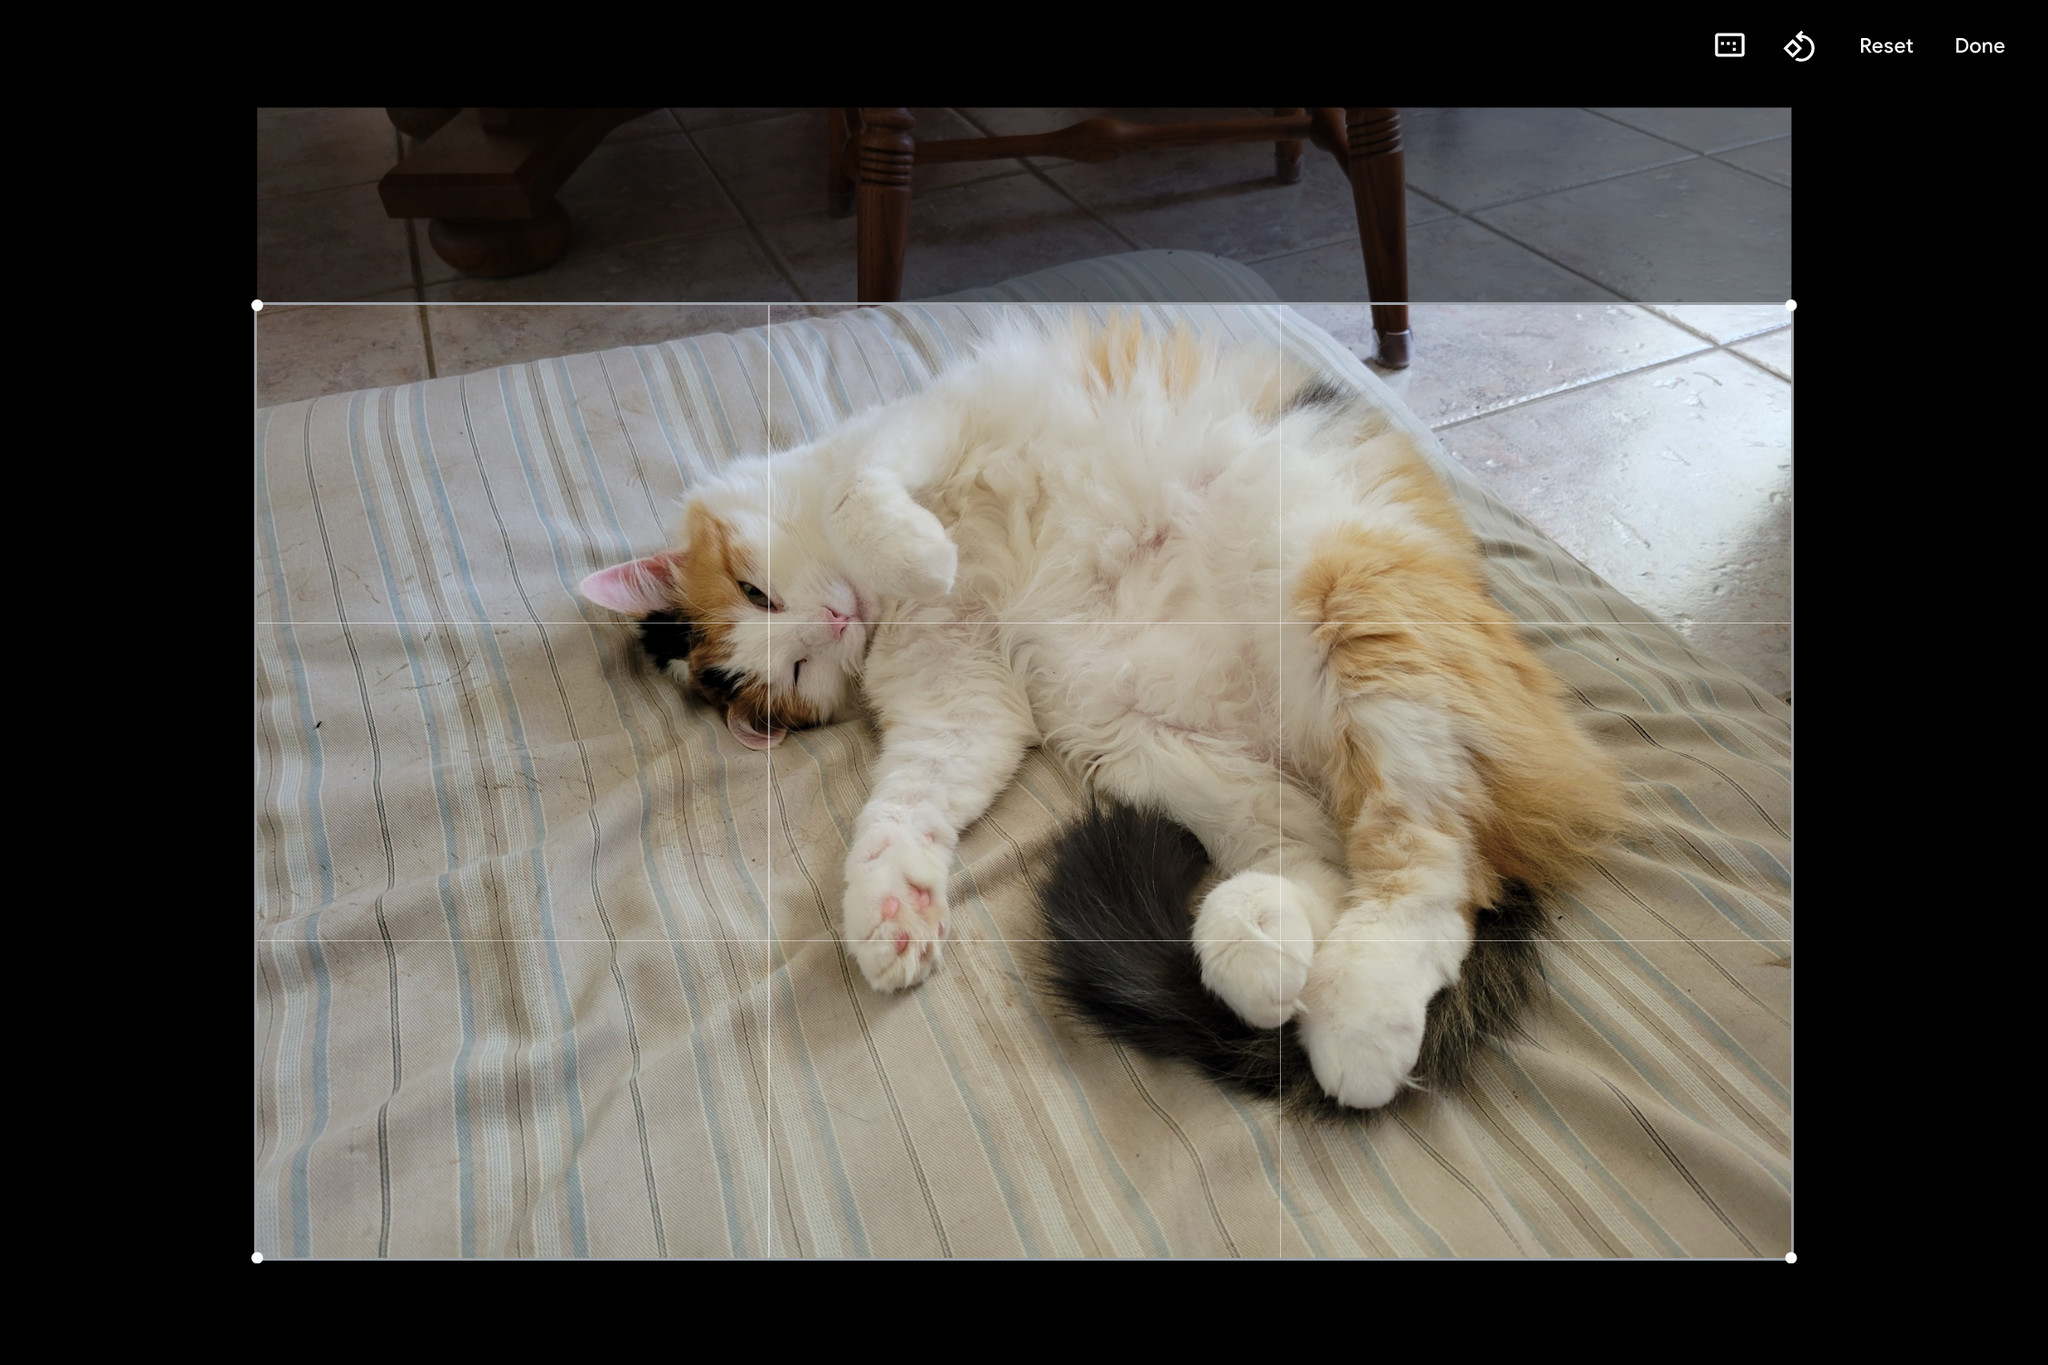
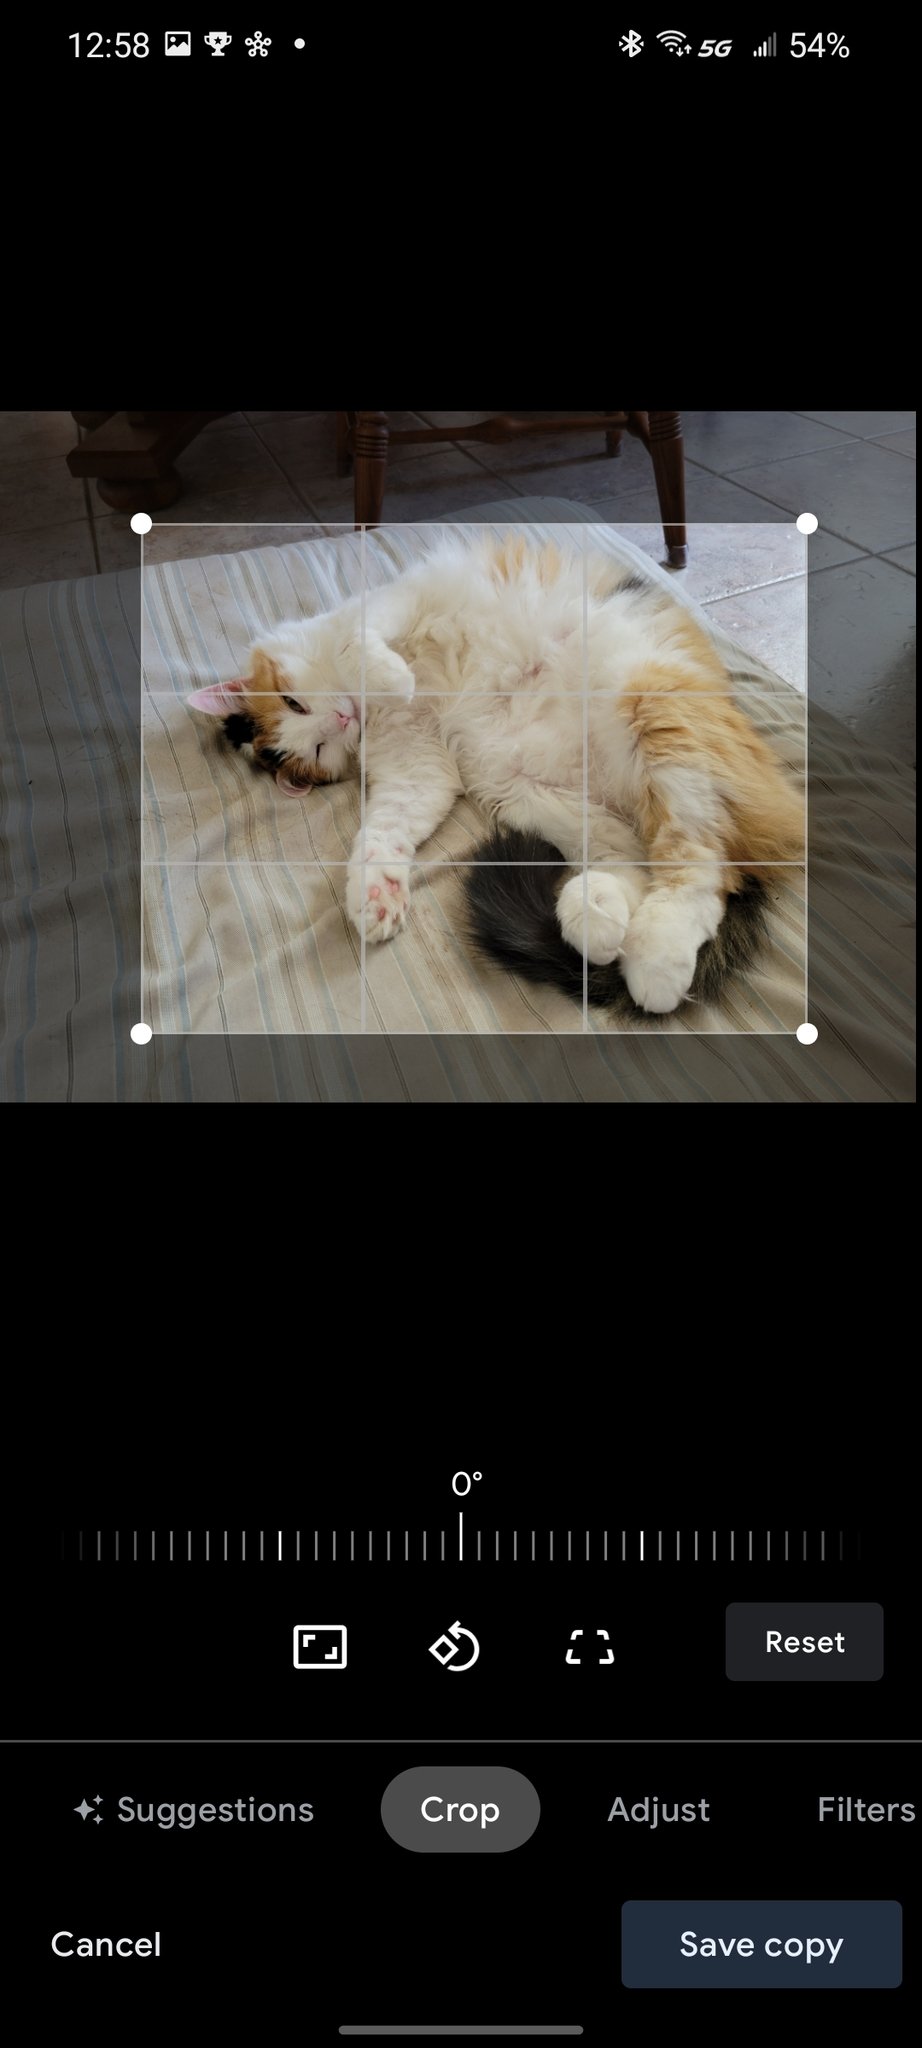
When modifying pictures, right here is the methodology that I like to recommend following to realize the very best look within the fewest steps:
Supply: Android Central
Step 1: Crop your photograph. This can be the final tab of the net editor, however doing it first implies that it will be simpler to paint steadiness and white steadiness your photograph, because it will not need to account for any super-white or further darkish spots in your photograph. Cropping first additionally implies that whilst you’re doing all your coloration tweaking, you will be primarily the completed photograph and might save and obtain when you’re pleased with it.
Supply: Android Central
Cropping is 5 instances simpler on a desktop/laptop computer/Chromebook than in your telephone. Whereas portrait pictures could generally (possibly) be okay to crop on-device, any panorama photograph will simply be too tiny to make sure you’ve received good margins except you’ve got received a type of fancy foldable telephones just like the upcoming Galaxy Z Fold 3.
Step 2: Strive your filters. I am not a lot of a filters lady since most of my pictures try to be true to life, however earlier than I futz with any brightness/coloration settings, I am going to a minimum of strive the Auto filter to see the way it does. Should you’re modifying a selfie for social media, you may strive all of the filters, however it doesn’t matter what, do filters earlier than the granular controls as a result of, in actuality, all of the filters are a pre-set mixture of granular controls.
Some filters are heavy-handed, and a few are extra delicate, however all of them are simply a mixture of the granular controls which can be routinely utilized. It is a good factor as a result of slightly than simply having that depth slider under the filter, you possibly can set a filter and tweak its particular person elements.
Should you like the general look of Bazaar however assume it simply turned the photograph manner too cool blue, you possibly can apply the filter after which modify the Heat up or Deep Blue down in Step 3: Handbook Changes.
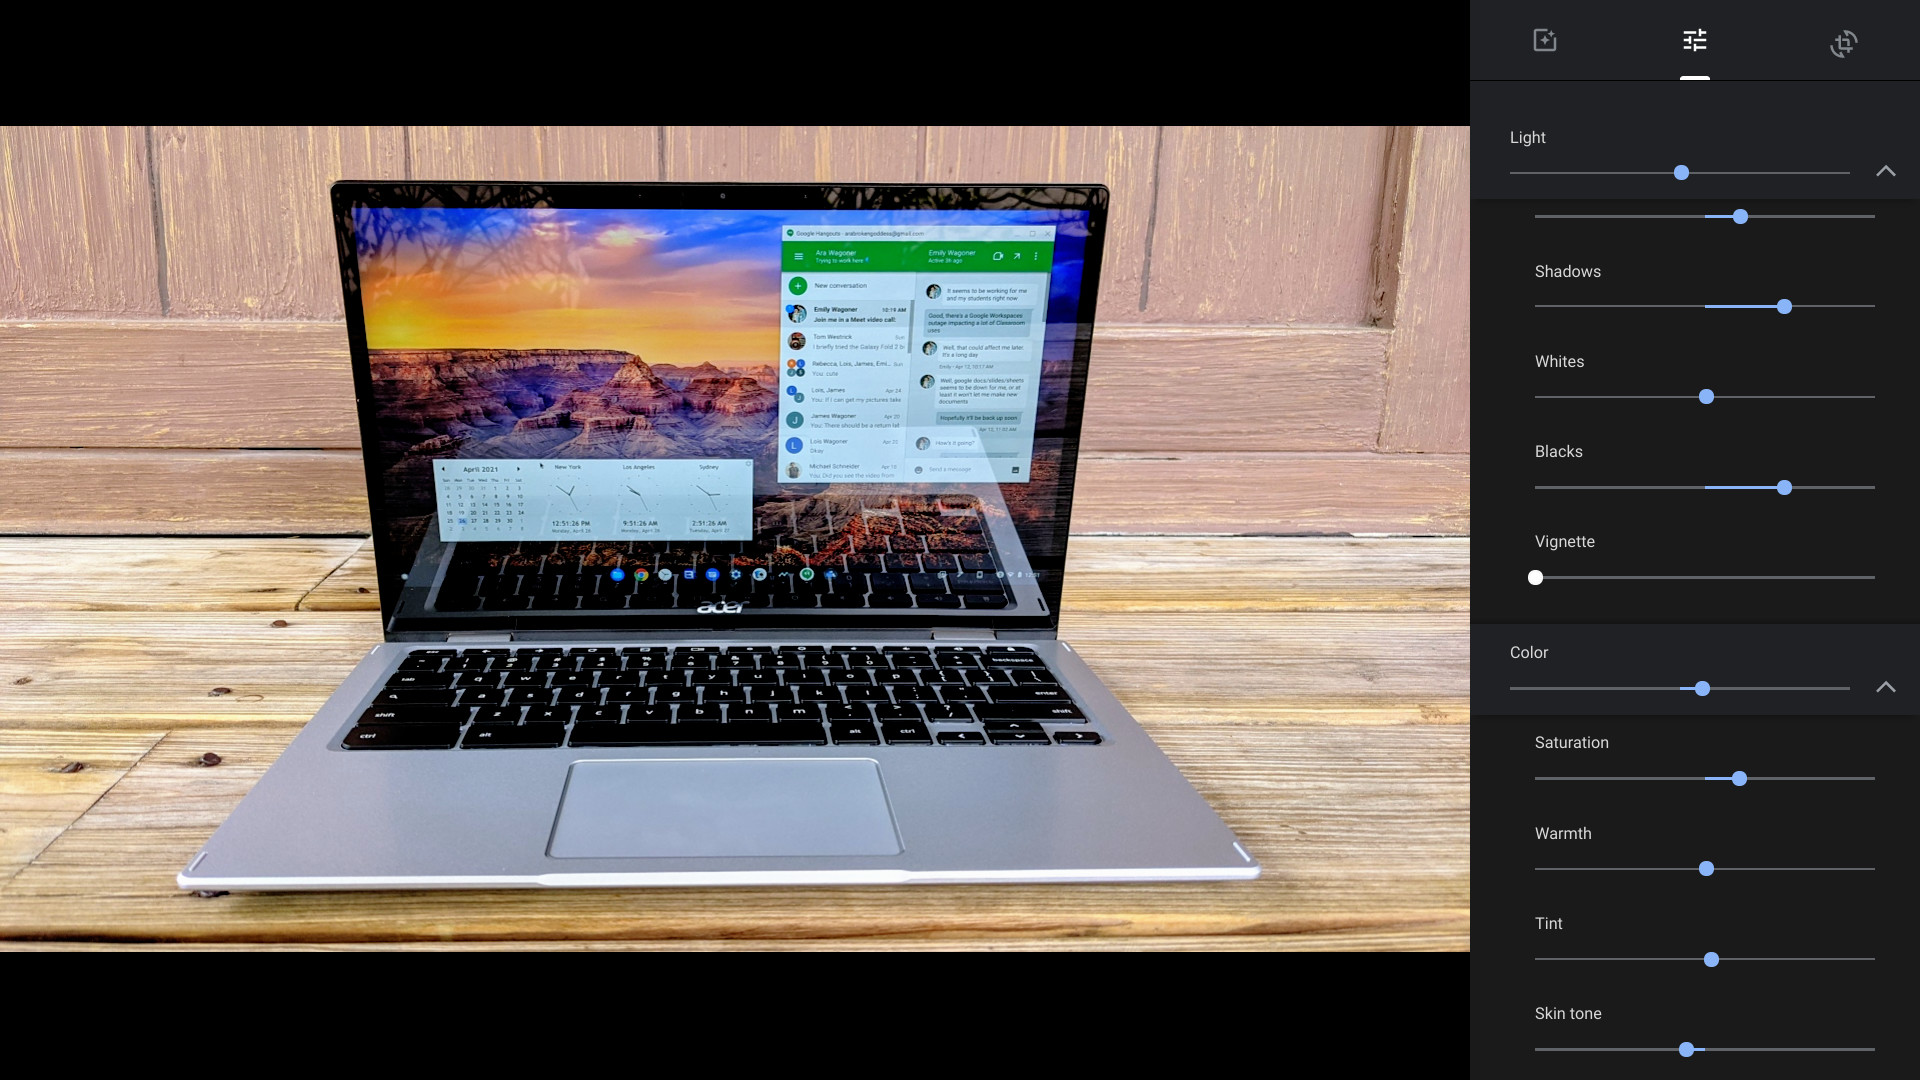
At all times modify brightness earlier than coloration
Supply: Android Central
You have got two fundamental sections of sliders within the Alter part of the Google Pictures editor: Gentle and Colour. At all times do Gentle/Distinction earlier than you do colours as a result of mild will affect coloration, serving to saturation or washing out colours relying on how heavy-handed your modifying is.
When modifying Gentle/Distinction, here is your cheat sheet for every slider:
- Gentle will brighten or darken the photograph, principally utilizing the Publicity and Highlights sliders. Left is darker, Proper is brighter, however it will possibly have a tendency to scrub out particulars and make a photograph look muted or blown out (over brightened).
- Publicity likewise adjusts the complete photograph darker (left) or brighter (proper), simulating in the event you used a unique publicity in your digicam. Use sparingly, as somewhat publicity adjustment can go a good distance.
- Distinction will lower (left) or enhance (proper) the excellence between mild and darkish sections of a photograph. You may seldom flip it down, however it’s one other slider that may simply blow out or overexpose a photograph in the event you flip it up too excessive.
- Highlights make the brilliant elements of your photograph dimmer (left) or whiter (proper). Use it with Shadows/Blacks to assist enhance distinction/brightness with out as a lot likelihood of blowing out a photograph.
- Shadows make the darkish elements of your photograph darker (left) or brighter (proper). In case your photograph appears somewhat too darkish, flip Shadows up somewhat after which modify Blacks and Highlights to compensate.
- Whites will lower (left) or enhance (proper) the general brightness of your photograph. Use sparingly, as it is easy to blow out pictures with it.
- Blacks will (lower) or enhance (proper) the general darkness of a photograph. That is good for blacking out reflections/flaws in a darkish floor/background, however do not go overboard.
As talked about, I are likely to tweak the Highlights, Shadows, and Blacks as a way to obtain my desired pop of brightness whereas having good distinction. Shifting on to paint, these sliders can appear barely extra formidable to these unfamiliar with conventional photograph editors or pictures phrases:
- Colour will modify Saturation, Pores and skin tone, and Deep blue as a way to flip all coloration in your photograph down (left) or up (proper). If you need greyscale, pull all of it the best way to the left. In any other case, I counsel leaving this one alone.
- Saturation makes all colours much less (left) or extra (proper) vibrant. Should you flip saturation excessive sufficient, it will draw the faintest colours out of seemingly greyscale components, however in the event you flip saturation up an excessive amount of, the photograph seems to be jarring and pretend.
- Heat refers to paint temperature and white steadiness, making a photograph look “cooler” and extra blue (left) or “hotter” and extra yellow (proper). This slider is price realizing so you possibly can coloration right in case your digicam’s white steadiness was off — or in the event you have been taking pictures on an overcast day however do not wish to look emo.
- Tint will modify the hues of your image, making it seem extra inexperienced (left) or pink (proper). Depart this one alone. There are only a few situations the place you will want it.
- Pores and skin tone will both lower (left) or enhance (proper) the colours within the vary of some pores and skin tones. It is going to enhance yellows, reds, and a few orange hues. That is one other slider that is good for making you look human on gray, overcast days (or in the event you’re a vampire).
- Deep Blue will scale back (left) or enhance (proper) the blue shades in a photograph. I like this slider as a result of I like blue, and that is additionally a great way to make blues pop in a picture with out turning Heat down.
Talking of pop, the Pop slider on the very backside of the Adjustment checklist will enhance distinction and coloration in a particular manner that tends to look good on social media. Nonetheless, it is a very noticeable sort of filtering you will not need for any pictures that you simply wish to look pure.
You in all probability do not want Authentic measurement uploads
Supply: Samuel Contreras / Android Central
Sure, horror of horrors, your “Top quality” photograph backups are now not free. They depend in direction of your Google One restrict, and so many have taken to utilizing Authentic as a result of all of it counts, so why trouble with compression?
Easy: most cameras, by default, take pictures which can be already throughout the measurement restrict for Top quality — now referred to as Storage saver — and your pictures aren’t what is going on to eat your storage alive anyway. Video can take up ridiculous quantities of storage when you get above 1080p. Until you are a budding vlogger or doing skilled movies of some variety for work, you do not really need all these further pixels anyway.
You probably have young children you are continually videoing or pets that you must showcase after they’re doing one thing good — or dangerous, or humorous, or cute — switching from Authentic to Storage saver might prevent gigabytes of storage a month in case your telephone shoots in 2K or 4K decision.
Additionally, keep in mind that in the event you’re involved about storage, you possibly can repeatedly go in and delete pictures you now not want, just like the photograph of the place you parked on the theme park, the affirmation quantity for a curbside pick-up you purchased two months in the past, or these 70 photographs your daughter took when she grabbed your telephone and one way or the other opened the digicam whilst you have been getting breakfast prepared.
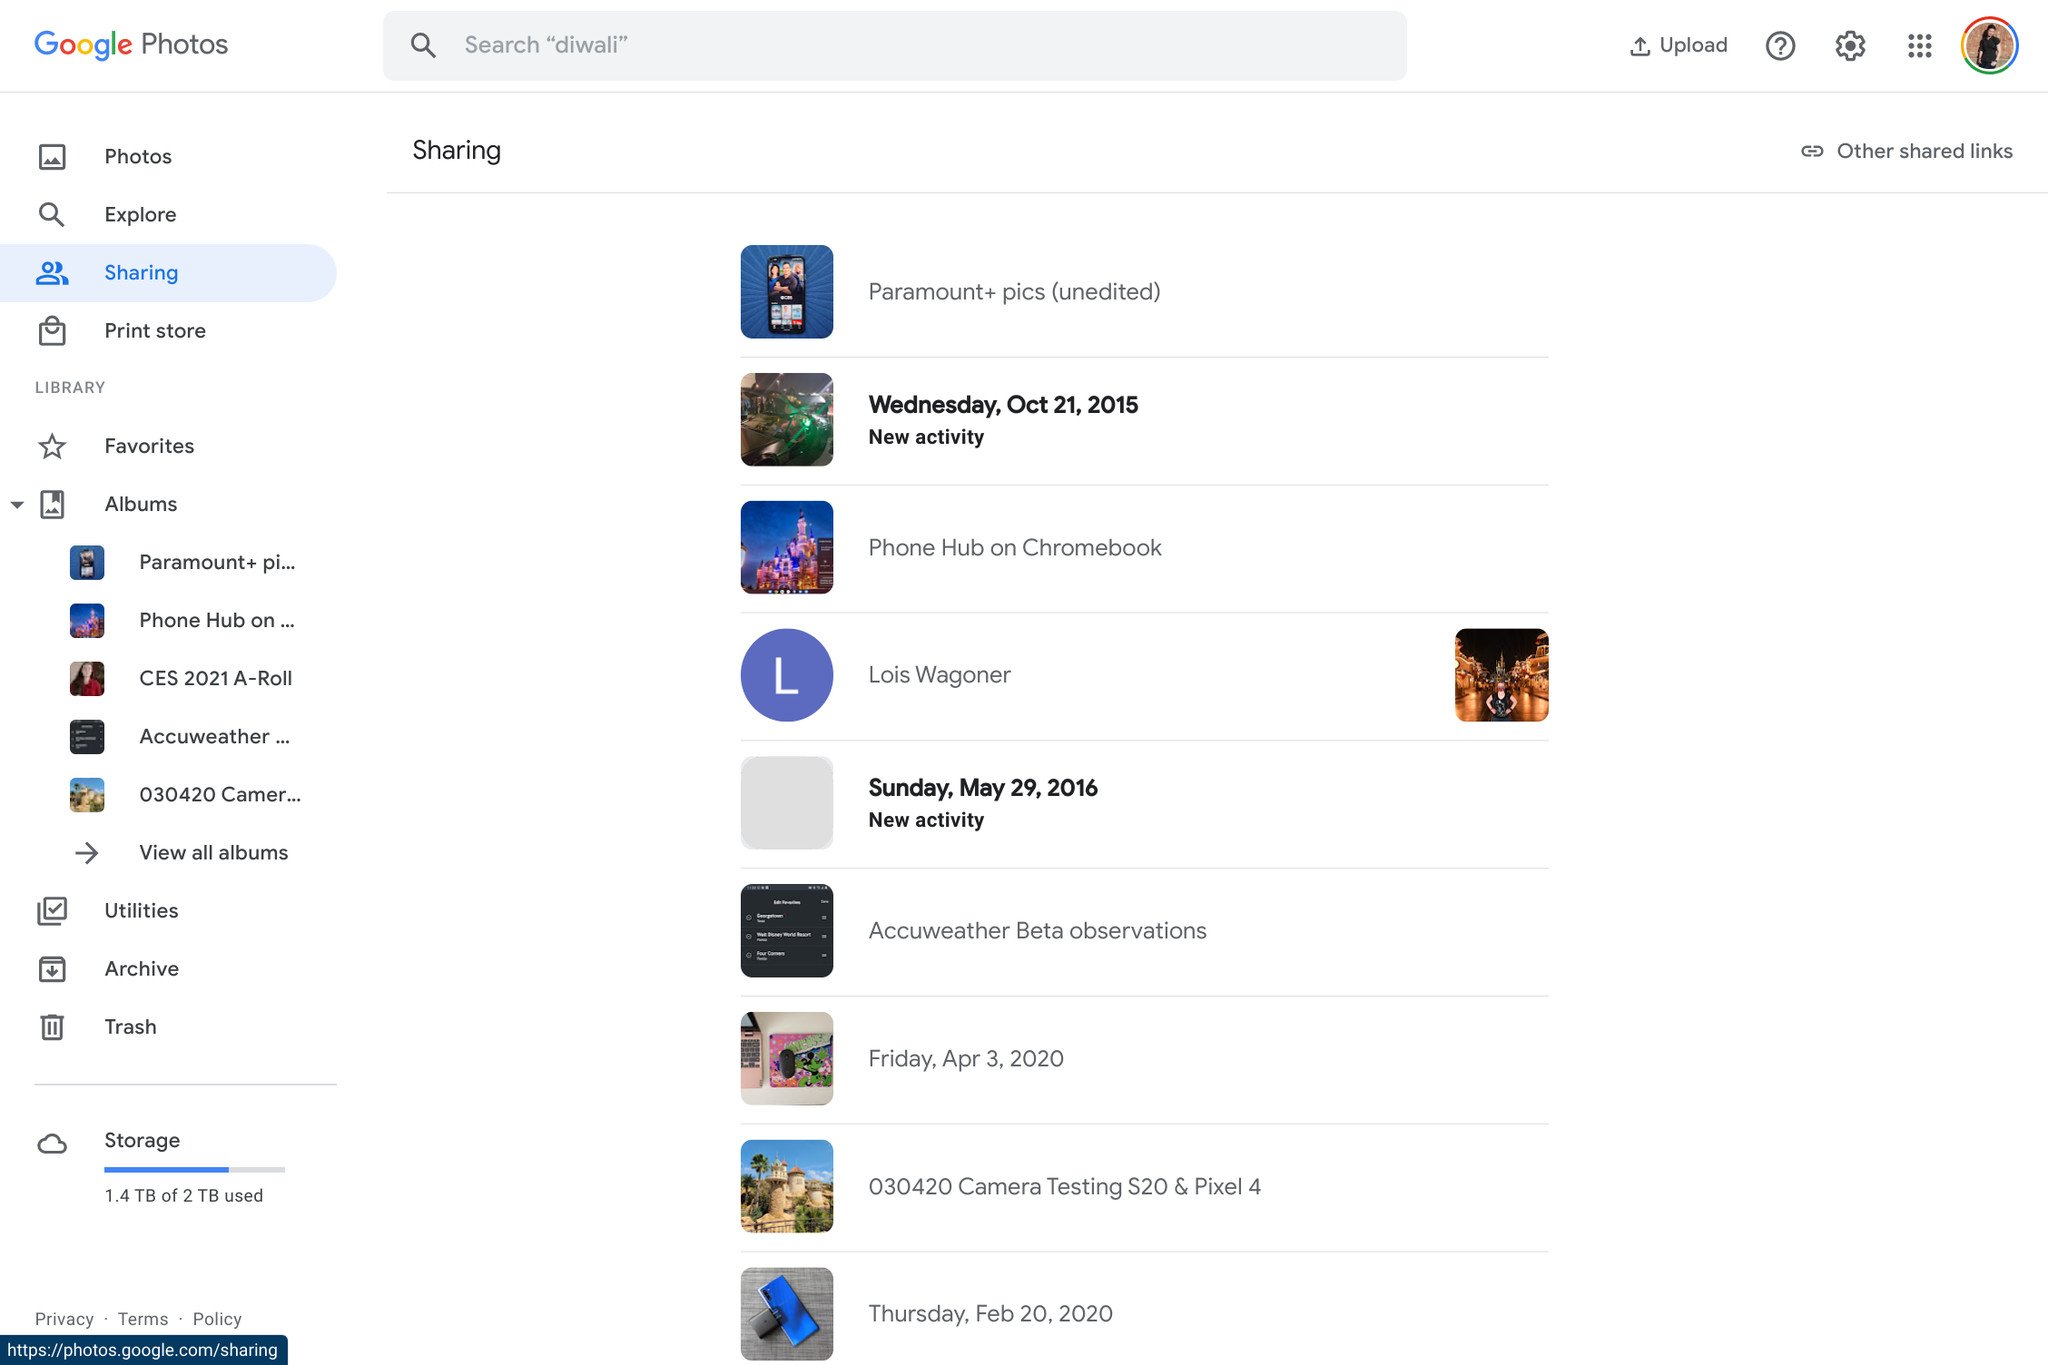
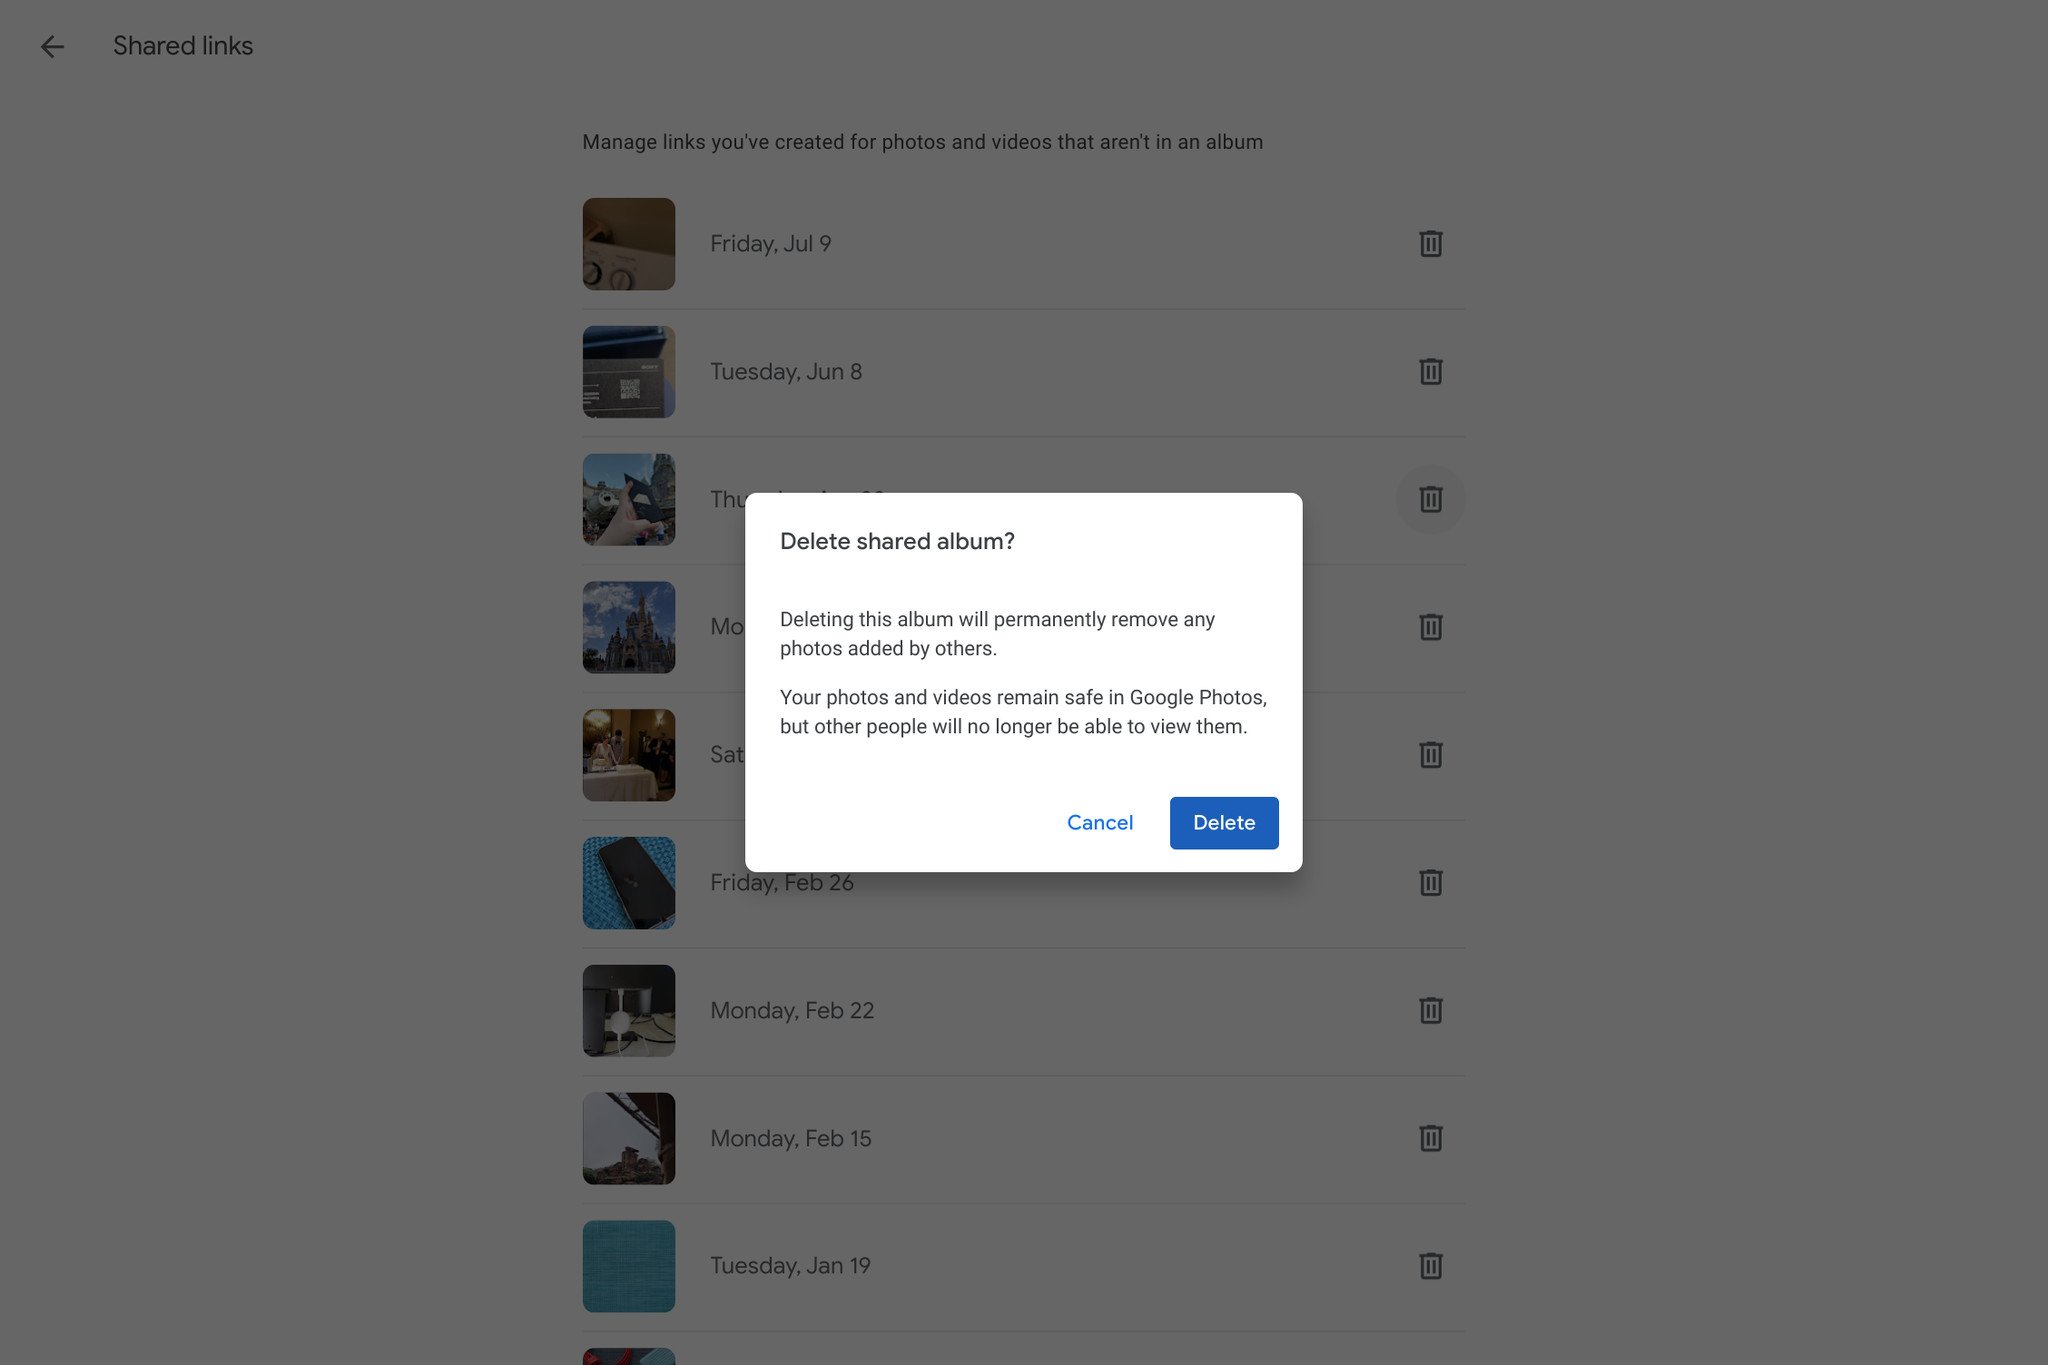
Clear out your share hyperlinks repeatedly
Talking of standard cleansing, do you know that Google Pictures share hyperlinks do not routinely deactivate after a set timeframe? Yeah, that hyperlink you shared together with your physician 5 years in the past (the one with the rash close-ups) remains to be a reside hyperlink that might one way or the other be discovered if a cat walks throughout the keyboard the unsuitable manner.
You possibly can clear out outdated share hyperlinks fairly simply, and here is how:
- Head to the Google Pictures web site.
- Click on the Sharing tab.
- Click on on Different shared hyperlinks.
- Hit the trash image for a hyperlink you wish to kill.
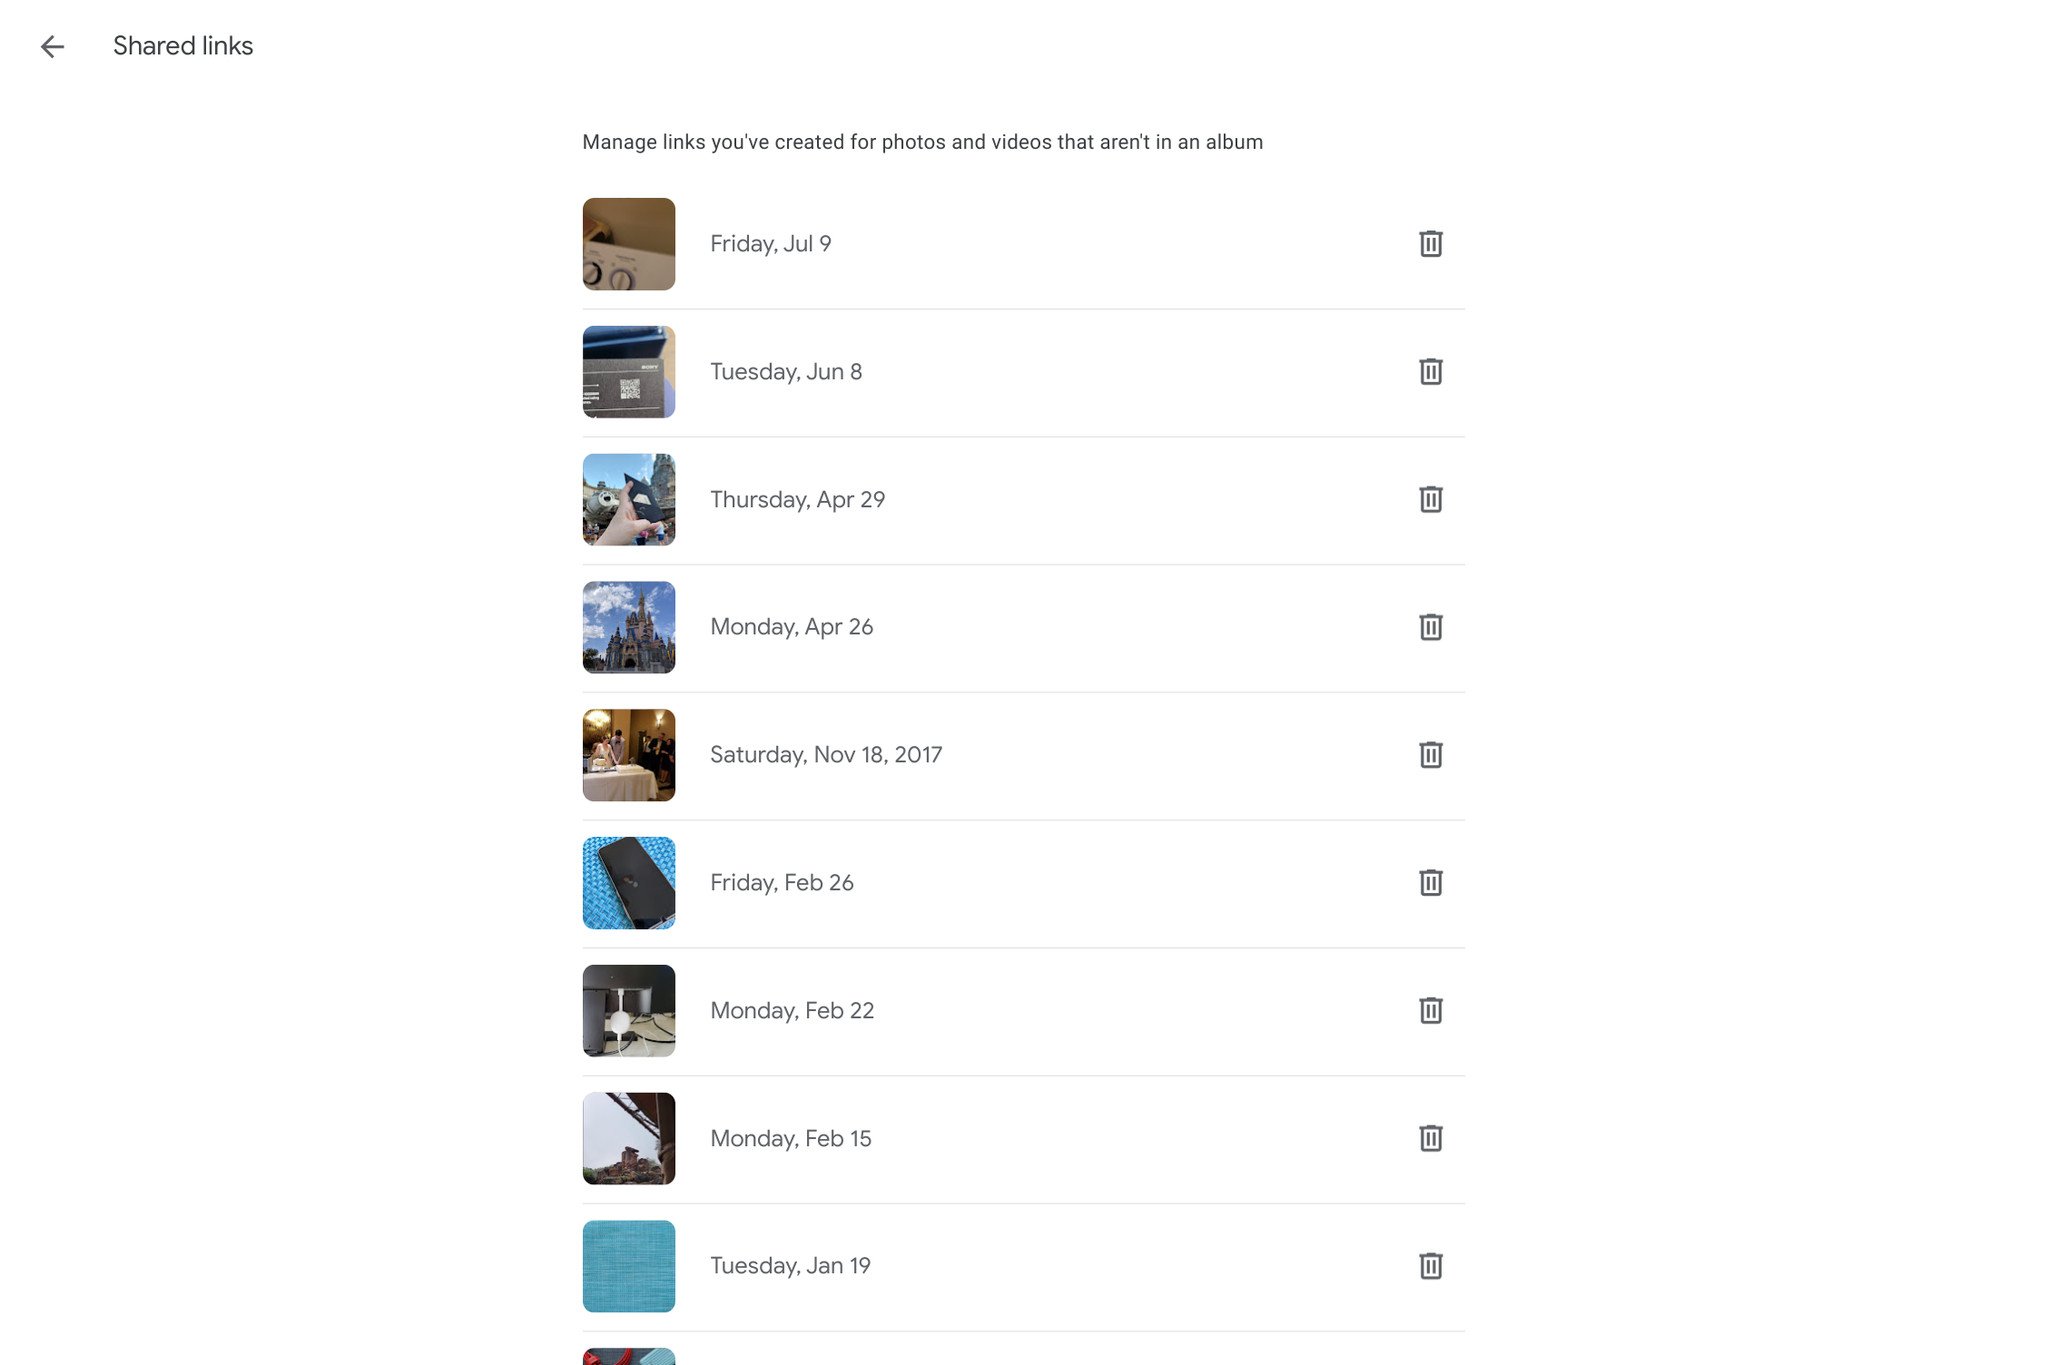
-
Faucet Delete.
 Supply: Android Central
Sadly, there isn’t any batch delete choice, so you must go hyperlink by hyperlink. I like to recommend both grabbing a pleasant chilly beverage or placing on one in every of your favourite reruns to look at whilst you two-click your manner by way of the checklist.
Pictures’ search is extra strong than you realized
Supply: Hayato Huseman / Android Central
You in all probability know that Google Pictures can acknowledge well-known places, faces, and customary objects in your pictures. Nonetheless, you won’t know that each one of this object identification can be used to tag your pictures routinely. Because of this in the event you search “automotive,” you will get all of the automobile pictures you’ve got ever taken, however you possibly can sort in “SUV” to only see pictures of and inside your Honda CR-V.
Sort in “flower,” and each flower will seem, however in the event you sort in “rose,” and it will single out these varieties to simplify your hunt for that decade-old yellow rose photograph. I am going to admit that not all searches will work this nicely: loads of cats present up once I search “canine,” and looking out “butterfly” additionally introduced up just a few pictures with none bugs in them in any respect.
And as I said again in our first tip, Google Pictures’ search can search archived pictures, too, so even in the event you archived an outdated photograph you did not assume you’d want anymore — like your outdated Driver’s License quantity out of your earlier state — will be discovered with a fast, painless search.
Shave day without work your photograph managing with these shortcuts
Google Pictures web site, like Chromebooks and most Google companies, has a bevy of helpful keyboard shortcuts that you need to use to hurry up your photograph administration.
- Shift + A — Archive photograph
- Shift + # — Delete photograph
- Shift + R — Rotate photograph
- Shift + D — Obtain photograph
- E — Edit
- Z — Zoom
- Arrow left/proper — Earlier/Subsequent photograph
- Escape — Exit present display (exit editor or return to gallery)
E, Z, and Shift + D are my three most used shortcuts for apparent causes, however remembering how you can Archive or Delete utilizing the keyboard could make it simpler whereas culling your gallery of outdated or unneeded pictures.
Now go make extra reminiscences
Supply: Ara Wagoner / Android Central
As soon as you’ve got mastered Google Pictures, you will be able to dive into precise folder administration, Companion Sharing, and having a gallery that is stuffed with pictures you really need, not simply each photograph you’ve got ever taken in your life. Whether or not you are a brand-new Pictures person otherwise you’ve been utilizing it because it arrived in 2015, there’s all the time one thing new to study, and I am keen to listen to any new ideas and methods you may discover throughout your Google Pictures safari.
from WordPress https://ift.tt/3zBXhSP


Comenta